How To Plan A Road Trip
With Google Maps
By plugging travel locations into Google My Maps you can get a good sense of how your itinerary should flow, along with being able to:
- Determine your trip mileage and driving times
- Save your map and edit it in the future
- Load your map on a smartphone for turn-by-turn navigation
Before we start making a custom map, take some time to decide what destinations you will want to be visiting. For some help and suggestions check out the previous article in this series, Road Trip Planner - Where to Go? Or check out my brand new Pacific Coast Highway Road Trip Guide - a curated list of the best spots along the coast from San Diego, CA to Vancouver, B.C.
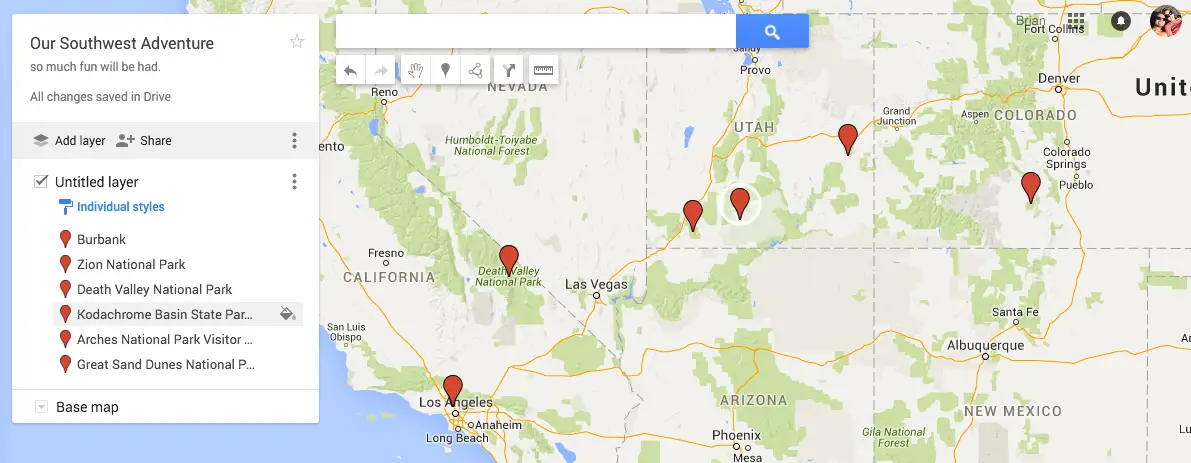
We are going to create an itinerary based on these locations:
- My homebase - Burbank, CA
- Zion National Park
- Kodachrome Basin State Park
- Arches National Park
- Death Valley National Park
- Great Sand Dunes National Park
One quick note- This article has been updated from the origional where we used GoogleMaps Classic and also a previous update using Google Maps Engine. Both of these options have now been depreciated by Google and replaced with the Google My Maps option. The new Google My Maps offers some improvement, and other shortcomings, but it is now the standard and still very useful for trip planning.
Let's get started.
LOG IN TO GOOGLE DRIVE
One improvement that comes along with My Maps is how Google compiles everything under their cloud-based storage platform -- Drive. It's now very easy to keep various maps and documents all organized under one trip folder. Visit https://www.google.com/drive/ to get started. You will be prompted to sign into your Google account. Click the Go to Drive button to get started. If you don't have a Google account, you'll need to make one to create and save maps.
Once signed in you'll see a big red New button on the upper left. To create a new map click this button, select More, and finally Google My Maps.
CREATE A NEW MAP
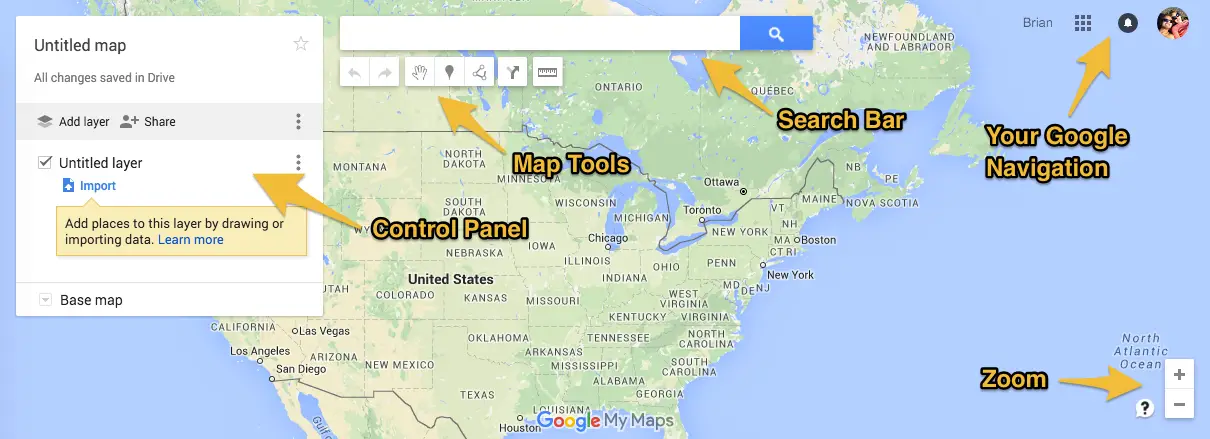
You will now be brought to the main My Maps interface. On the left side is the map control panel, use this to organize your layers and toggle on/off visible information. The upper left is home to the search bar, and just below it is a set of buttons used to add information markers to the map. On the right side you'll find icons to access other parts of your Google account (such as email), and map zoom controls.
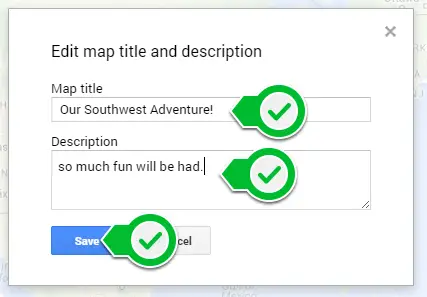
In the control panel, select Untitled Map, enter in a map name and description, then click Save.
GREAT! NOW LETS ENTER YOUR HOME LOCATION

First, add your starting and ending locations. In our case we will begin from our base in Burbank, CA and end there as well. In the Search Bar enter your starting address and hit Enter.
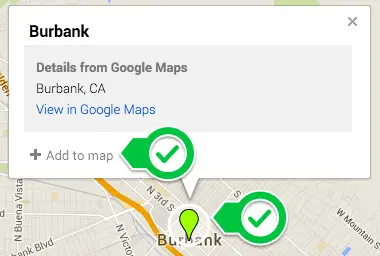
You'll notice a Pin has now been dropped in that location.
Click on the pin and when the Dialog Box opens click Add to Map on the bottom left.
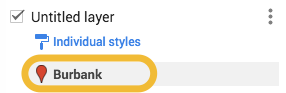
The pin will change colors and you will see that location is now stored in a layer in the control panel.
That's it! Your very first placemark.
If you are ending at a different location go ahead and repeat this step to add that address now.
DECIDE WHERE YOU'RE GOING
You might already have an itinerary in mind. If that's not the case, check out my article on Determining Where To Go for a simple stragety and some great ideas. Or grab a copy of one of these great books for inspiration.
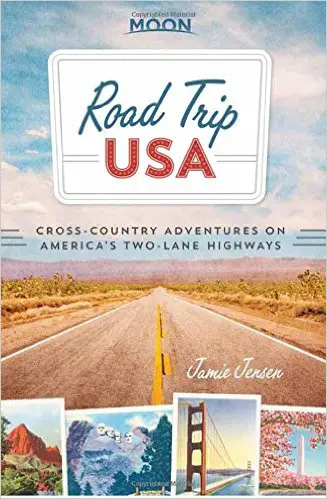
Road Trip USA, by Jamie Jensen
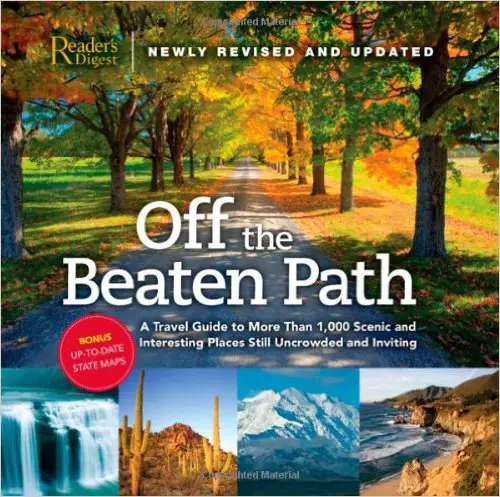
Off the Beaten Path, by Reader's Digest

National Parks Of America, by Lonely Planet
ADD YOUR DESTINATIONS
Use the same process of searching for a location, selecting the pin, and saving to your map for each of your other destinations. Let's go through it once more.
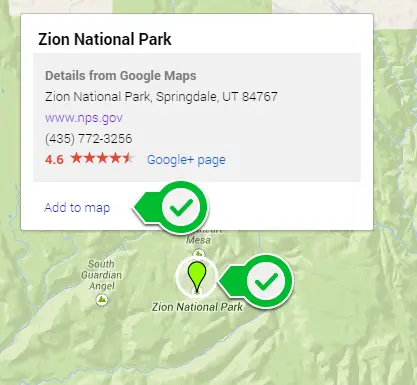
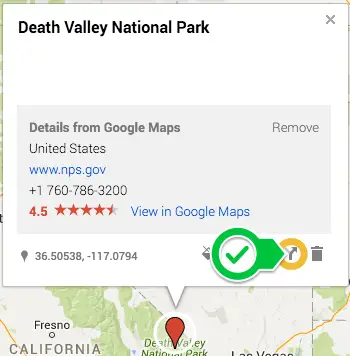
I want to visit Zion National Park so I'll enter that in the Search Bar and hit Enter
Then click on the Pin, and hit Add to Map.
Repeat these steps for all remaining destinations.
Loving this? Sign up and get the latest goods delivered right to your inbox.
DETERMINE A ROUTE
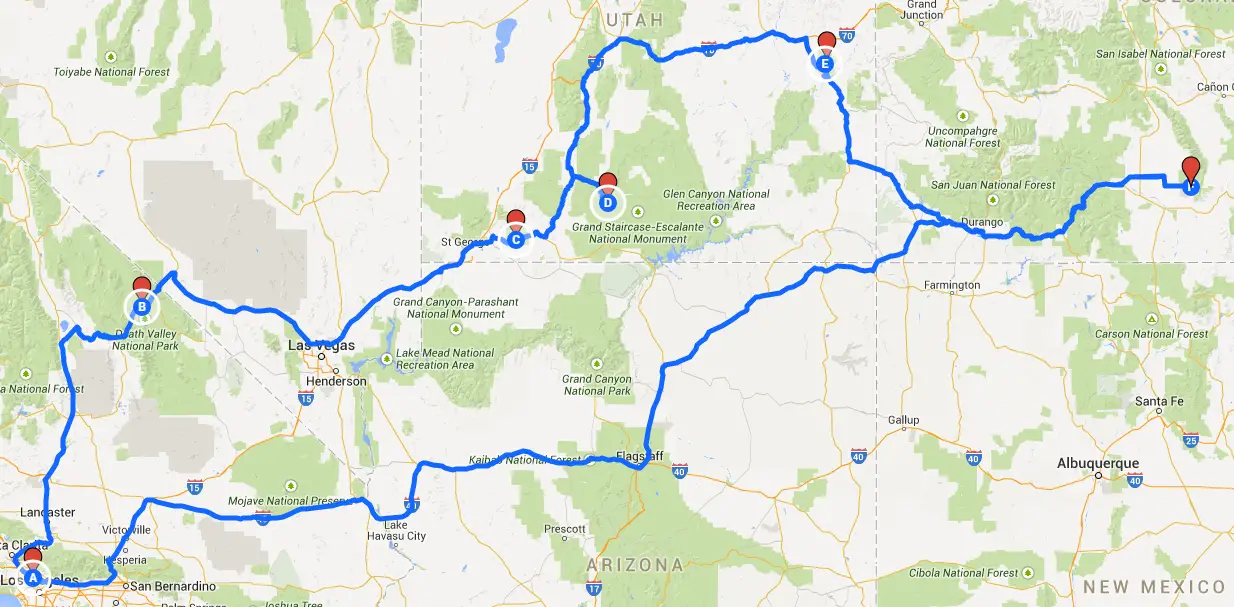
At this point you should have all your destinations added as Markers, along with your starting and ending locations. Resulting in a map that looks something like this.
Now it's time to plan a route.
Take a look at where the pins are scattered and make a note of the order you want to visit each place.
Click on the first destination marker you want to visit, either on the map or in the control panel.
In the Dialog Box that open, click on the Directions Icon in the lower right.
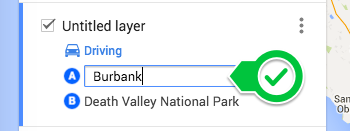
In the control panel a new layer will appear that hold driving directions. Under the A row type in your starting location. You should see the marker appear as you type it in. Then hit Enter.
If you get a yellow popup saying "Couldn't Find a Route" then you will have to adjust the position of your marker. This happens because Google often drops the pins where there are no roads. To adjust, find the pin and click and hold. Then you can drag it to a more accessible spot.
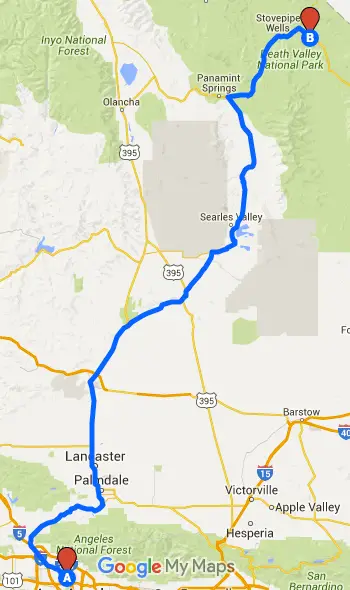
You should now see a route between your starting location and the first destination.
Now it's time to add in the remainer of your destinations and return location. Make sure the Directions Layer is selected (I renamed it) by clicking on the title. You will know it's active when you see the thin blue bar just to the left. Then click Add Destination.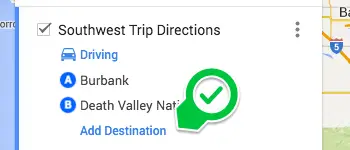
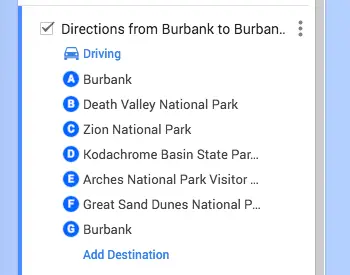
Type your destinations in the order you wish to visit using the slots B, C, D, etc.... Use the Add Destination text to create more spaces. ** Note ** You can only create 10 destinations (A - J) for each directions layer. See limitations for more details.
MAKE ROUTE ADJUSTMENTS
You now have a basic itinerary, including driving directions, destinations, mileage, driving times, and an overall map.
If you are happy with the route you can Share it by clicking the grey button in the control panel. Within the Share Dialog Box you can invite people via email, copy the map link, share on social media, and customize access (edit versus view).
You can adjust the route between two destinations by clicking the blue route line to select it, then click, hold, and drag to add a new point. Undo this action by clicking on the white dot that appears along the route.
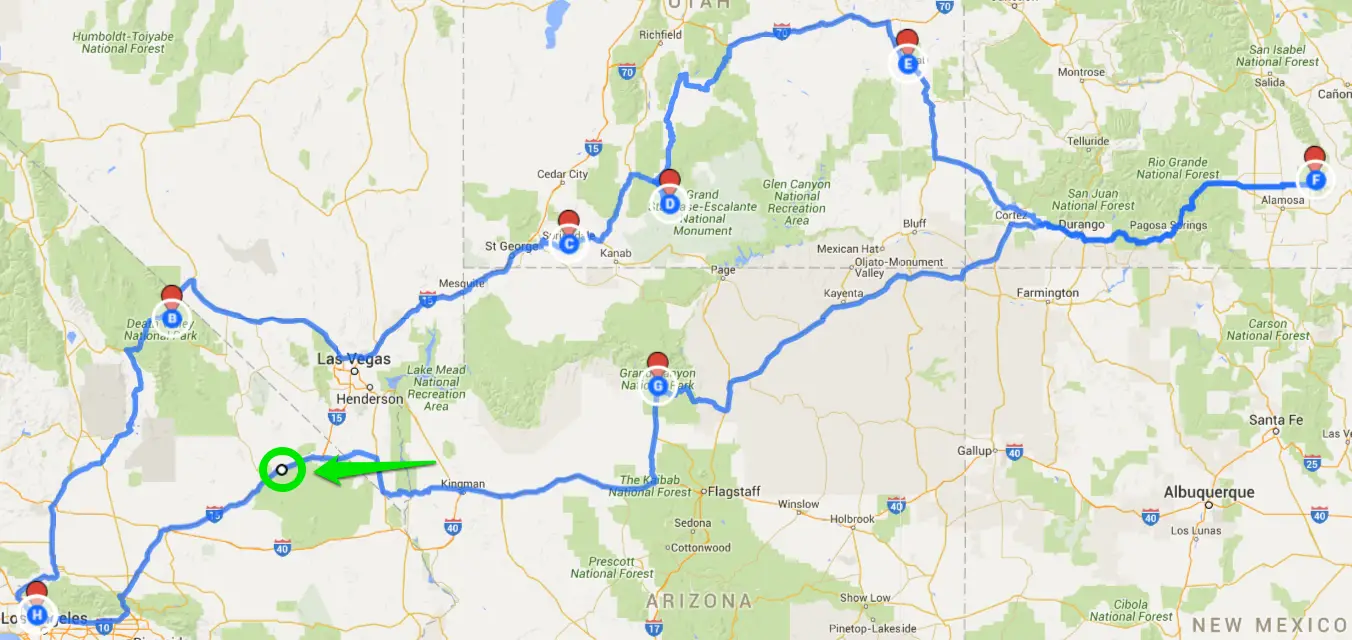
In my itinerary I noticed that Great Sand Dunes National Park adds a lot of driving, so I'm going to remove that destination and save it for a later trip. Instead I will stop at Grand Canyon National Park which is more on the way home.

Go ahead and make any edits or addition necessary by reordering the driving direction pins and adding/deleting locations. For extra details such as mileage between destinations and drive times, click on the 3 vertical dots next to the layer title and select Step-by-Step Directions.
ADDITIONAL DETAILS
Google My Maps allows you to have 10 layers total (an improvement on Maps Engine), currently I'm using one for driving directions and one for location markers. Additional layers can be used for more driving directions and amenities.
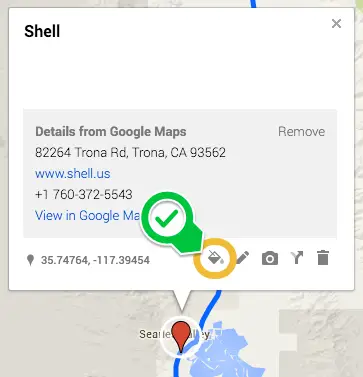
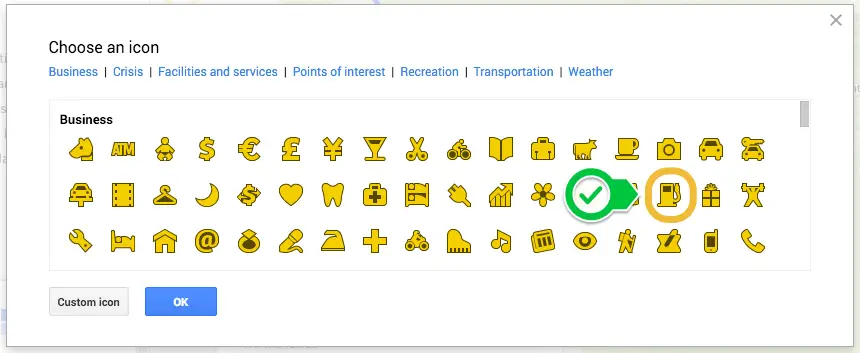
For instance, I definitely want to get gas before driving into Death Valley so I'll look up a gas station just before and add it to my map in this new layer. You can also adjust the color and icon style for better readability. Click on an icon and select the Style icon to do this.
Shops, laundry, grocery stores, gas stations, and resturants are all great pins to add. The more research you do ahead of time the less you will be aimlessly wandering later on (not that it's always bad to do that!).
LIMITATIONS
While Google My Maps has made some great improvements (such as adding more layers, Drive integration, and turn-by-turn navigation), there is one notable limitation.
-
Limited Driving Directions Points: Only 10 points can be added to each directions layer. For long trips this might mean you need multiple directions layers or even multiple maps (with specific sections).
TURN-BY-TURN NAVIGATION
The power of creating a map really comes into play during your trip. By using the Google Maps app it's easy to reference key points as you go along, AND use turn-by-turn navigation for driving directions.
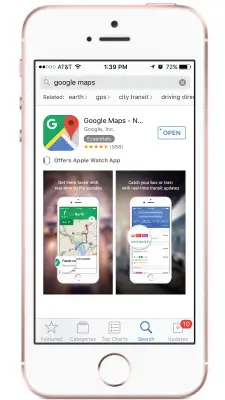
Start by downloading Google Maps in the app store - this application is available for both iOS and Android users.
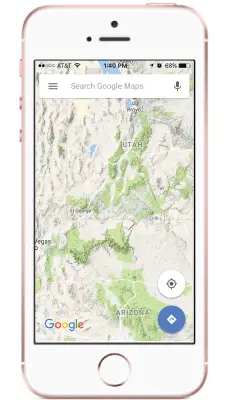
Open the app and look for three horizontal bars on the left side of the search bar.
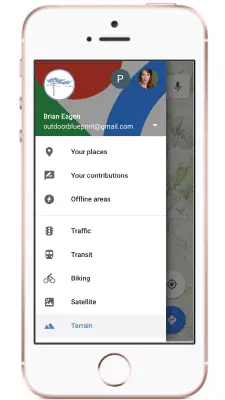
A sidebar will scroll out from the left. Look for and click on the category title called Your Places. This will pull up a list of the maps you have saved.
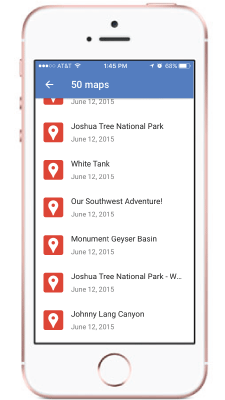
Click on the map you'd like to pull up, in my case it's titled Our Southwest Adventure!
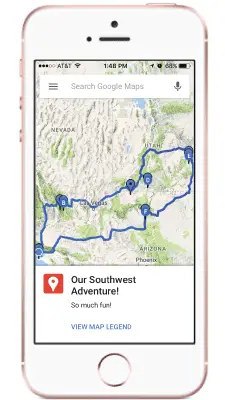
The map will appear with any driving directions and pins you've placed.
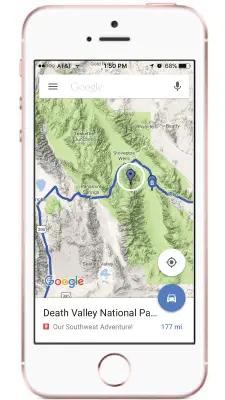
To start turn-by-turn navigation, click on a pin and then click on the blue car icon in the lower right hand corner.

That's it. You'll be given a few route options which you can toggle between, otherwise hit start and away you go!